Making-of: Flutter Fortune Wheel
Have you ever been frustrated by not finding a suitable package? Recently I encountered this feeling while looking for a wheel of fortune in Flutter. So I decided to dive deep into Flutter and build one myself. What follows is the story of creating a fortune wheel, like the one shown below, using CustomPainter, LayoutDelegate, animations and more. It is the first part of a bite-sized series on the details of this package.
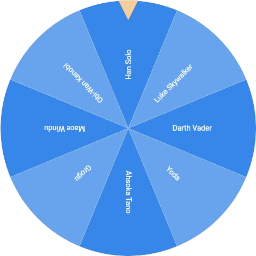
My main objective was to create an implementation, which is composed of individual Flutter widgets instead of using images, as other solutions do. This allows for making best use of hot reloading and does not require additional tools for creating suitable images. Furthermore, each slice within the wheel should allow for individual styling as well as hosting arbitrary child widgets. Finally, the wheel must spin before showing a selected value to be a real wheel of fortune, which we will achieve using a Bezier-curved animation.
Let's start by drawing a simple slice of a pizza...ehm...circle 🍕
Path buildSlicePath(double radius, double angle) {
return Path()
..moveTo(0, 0)
..lineTo(radius, 0)
..arcTo(
Rect.fromCircle(
center: Offset(0, 0),
radius: radius,
),
0,
angle,
false,
)
..close();
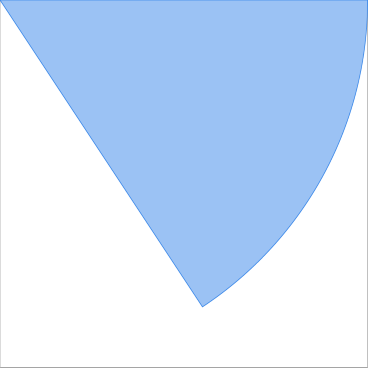
}The code above draws three simple lines:
- a straight line from the top left corner to the top right corner
- a curved line from the top right corner to the bottom left corner
- a straight line from the bottom left corner back to the top left origin
Drawing this path using a CustomPainter is shown in the picture below. I added a border to the surrounding widget to highlight that it still has a rectangular shape, as all widgets in Flutter do. In general, this is no issue, but as we will see later, it might complicate positioning, when adding indicators to our wheel.
class CircleSlicePainter extends CustomPainter {
final double angle;
final Color color;
const CircleSlicePainter(this.angle, this.color);
@override
void paint(Canvas canvas, Size size) {
final radius = Math.min(size.width, size.height);
final path = CircleSlice.buildSlicePath(radius, angle);
canvas.drawPath(path, Paint()..color = color);
}
@override
bool shouldRepaint(covariant CustomPainter oldDelegate) {
return false;
}
}
class CircleSliceView extends StatelessWidget {
@override
Widget build(BuildContext context) {
return CustomPaint(
painter: CircleSlicePainter(Math.pi / 2, Colors.blue),
);
}
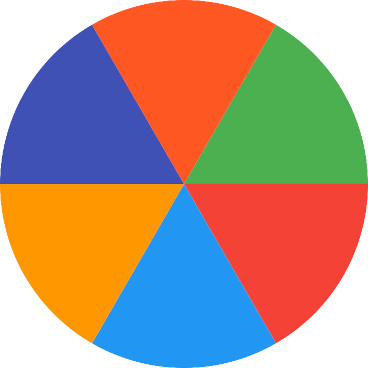
}This example uses our previously defined buildSlicePath function to draw its path on a canvas. The slice's size can be configured using the angle property of the CircleSlicePainter, which determines the part of the circle to be drawn, ranging from 0 to 2 × π. Now that we know how to draw a single slice, we can build a circle by drawing many slices and rotating them accordingly.
class CircleView extends StatelessWidget {
  @override
  Widget build(BuildContext context) {
    final colors = <Color>[
      Colors.red,
      Colors.blue,
      Colors.orange,
      Colors.indigo,
      Colors.deepOrange,
      Colors.green,
    ];
    double anglePerSlice = 2 * Math.pi / colors.length;

    return Stack(
      fit: StackFit.expand,
      children: [
        for (int i = 0; i < colors.length; i++)
          Transform.rotate(
            angle: i * anglePerSlice,
            alignment: Alignment.topLeft,
            child: CustomPaint(
              painter: CircleSlicePainter(
                anglePerSlice,
                colors[i],
              ),
            ),
          )
      ],
    );
  }
}
A slice's size can be computed by dividing its maximum size (2 × π) by the number of slices. The stack widget allows us to put all slices at the same position. Then each slice is rotated according to the angle obtained by multiplying the size of a slice with its index in the circle. The center of our circle is actually in the top left corner of each slice's box, as can be seen by the example of drawing a single slice. Therefore, the alignment for its rotation is set to Alignment.topLeft.
Great! We are now able to draw a circle composed of any number of individually customizable slices. In my next article, we will implement a MultiChildLayoutDelegate to correctly position child widgets within the slices. In the meantime, if you don't want to wait for the next article, you can find the package's code on Github.
Further reading
- CustomPainter Flutter docs
- my inspiration for using a path-based approach